Wednesday, February 29, 2012

Homemade Wheat Thins

I love reading blogs and the ideas people share. Yesterday I found a recipe for homemade Wheat Thins and just had to give it a try using my own fresh ground whole wheat.
The recipe was for mixing by hand but I used my mixer.

To keep the dough from sticking to my cutting board I sprinkled it first with whole wheat flour.

The recipe makes a dough about the size of a large grapefruit.

Cut this into quarters.

And roll very thin. I was impressed with how easy it was to roll out the dough.

Using a pizza cutter cut your dough into squares. Next time I do this I will first trim away the rugged edges because these edges cooked first and got a little too dark.

Place on a cookie sheet covered with parchment paper. I wanted my salt to stick to the crackers so I smeared on water and then sprinkled my salt; it worked like a charm.

Bake your crackers in a pre-heated 400-degree oven for 5 to 10 minutes. Watch them closely because they cook very fast. I checked on them after 5 minutes and then again each minute until done.

The crackers taste similar to Wheat Thins and were worth trying. Next time I make these I would like to sprinkle garlic salt instead of regular salt to see how they turn out.

The recipe came from the web site Tracey's Culinary Adventures.

Tuesday, February 28, 2012

Bed Pillow Tutorial

Today I made myself a new bed pillow. I began with a piece of scrap fabric similar to ticking.The fabric was folded in half and cut into a rectangle measuring 20" x 25".
Next I added a serged finish to one of the 20" edges on each layer of fabric.

After serging I laid both rectangles together and began stitching about 2-inches from one corner working my way around; be sure to leave a very large opening on the serged side of the rectangle.

Now it's time for the batting. I like to use my scraps for smalls projects and find it's very easy to stitch scraps together with a large zig zag stitch.

The zig zag isn't pretty but it will never be seen.

Now lay your batting on each side of your pillow rectangle.

Pin in place so the batting doesn't shift when you begin sewing.

Slowly trim any excess batting from the edge; be sure not to cut into your fabric.

I like setting my machine to a large zig zag and stitching around the entire edge leaving the opening untouched.

Now it's time to turn the pillow; here is where you appreciate having the large opening.

It's easy to reach in and gently push the corners out with your fingers.

Now it's time for the stuffing. I like to buy my stuffing at Jo Ann's when they offer a 50-off coupon. It comes in a 5-pound box and lasts a long time.

When you first begin adding the stuffing fill in at the back corners and work you way to the front. Be sure not to get the stuffing in between the fabric and batting, it needs to go in between both layer of batting.

The batting helps your pillow hold it's shape and also gives a little extra padding.

Now it's time to pin the opening. I like to tuck the batting out of the way and fold the fabric just a little; stitch close to the edge with your machine. I only stitch by hand if the pillow is to be used on a couch or chair.

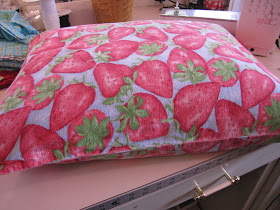
And here is my new fluffy bed pillow made from scraps.

It fits perfectly into a standard pillow slip.

Elizabeth loves my new pillow so much she has requested a new pillow for her bed so I guess I best get busy and make another one!

Monday, February 27, 2012

Artisan Bread

Last year I tried making Artisan Bread after my sister and mom raved about it. I wasn't thrilled and thought no more about it. However, after recently reading about it once again in blog land I decided to give it a second try. This time I let my dough age for a week so I could achieve the sour smell.
When baking day arrived I started with a nice hunk.

Shaped and tucked as the instructions stated.

When the bread was ready to place in the oven I cut slits on the top.

I baked my bread in a 450-degree oven using the steam method so my crust would be crisp.
Using my broiler pan for holding the water worked perfectly.

I was impressed with how much the bread rose in the oven. It was so pretty!

The outside crust was everything I wanted it to be; the steam meathod was so worth it.

Sadly I didn't cook it long enough. What I had read was to bake it anywhere from 30 minutes to 45 minutes; I opted for 30 minutes so next time I'll try 45 minutes.

I'm still not excited with the taste. However, it was very good with honey and I imagine it would be real good with soup. I like it enough to keep trying and I like how we ate the loaf right away so there wasn't any leftovers; which is good because bread is best right out of the oven. And I plan to check out an Artisan book from the library to read more about it.

Thursday, February 23, 2012

Always on the Lookout for a Deal

When I go into the grocery store I am always on watch for an unadvertised sale or markdowns.
One day I found two pound cartons of strawberries marked 99-cents. What a deal!

I purchased 20 pounds since the price was so good.

When I got home I spent the evening washing and slicing strawberries.

The chickens were able to share in the bargain too.

Of course we had to dip a few of the berries.

But most of the berries were put into the freezer;

To be served in May as strawberry shortcake as well as added to ice cream for a big celebration that is coming up.

Wednesday, February 22, 2012

Camping Preparations

I have a new toy!
For several years I have dreamed of travel and camping.

I wasn't sure if I was going to buy a conversion van, a small travel trailer or a pop-up.

My decision was made when I found this nice used pop-up at a price I could afford.

It has a cute little dinning area with storage under the seats.

A miniature sink.

A two burner stove. I imagine the stove will heat up the inside too much so I may just cook outside on the camping stove.

A tiny dorm size refrigerator.

The inside is pretty small but it will at least keep meat cold.

A little counter and storage area.

The door is stored on the ceiling. I need to learn how to level the pop-up so I can attach the door.

The sleeping area is pretty spacious.

I plan to add a second layer of foam to each bed and then make sheets too. The fabric is in good shape but not soft enough to sleep on.

Elizabeth is so excited and wants to use the pop-up right away.

We may set it up in the yard and "play camping" this weekend. Wouldn't that be fun!