Saturday, March 31, 2012

Stretch Needles

Recently, while reading a new to me blog, I learned about "stretch" needles.They are amazing! And best of all, no skipped stitches or fabric catching in the feed dogs.

I'm so impressed with how nice my stitches came out.

Until this week, I had never heard of a "stretch" needle, only "knit" needles.

So glad I now know about them.

Thursday, March 22, 2012

Bagels

I am on a quest for the perfect homemade bagel.
For my first try I used my favorite white bread recipe and followed cooking directions I found on line.

The bagels looked pretty but came out too thin and didn't taste like a bagel.

For my second try I used a recipe on you tube. They came out big and pretty but the texture was wrong. It was a little too light and fluffy inside instead of thick and heavy like store bagels.

I plan to keep on trying. The kids and I love eating toasted bagels.

Monday, March 19, 2012

Quilt Club Block 3 of 12

Each month on quilt day we are suppose to show our finished block right before class starts. Up until now I have been carrying my blocks in a zip lock bag but decided to make a tote specifically for class; complete with a clear window on the front.I love my new tote and I love how my blocks stay flat and smooth and organized.

This month's block is finished and ready to be added to the tote bag.

Wednesday, March 14, 2012

Cooking Class

Yesterday Jonathan and I took a cooking class that was everything I hoped for and more.We learned to make an apple tart and Profiterolles.

The class was small, perhaps a dozen students and two teachers. Jonathan was the youngest student which surprised me because it was held at Tech and I thought the class would be full of college students.

As soon as the class was over Jonathan wanted to go buy the supplies to make our own apple tart; which he took to work this morning.

Until I find a used tart plate at the thrift store I'll be making my tarts free form; and considering this was my first try I was pleased with how round mine came out.

Friday, March 9, 2012

Roasted Peanuts

I have become addicted to roasted peanuts. The flavor is wonderful and nothing like the peanuts you buy in the store. Begin with a cup or two of raw peanuts.Pour into a baking pan with sides. Be sure all the peanuts are sitting on the bottom of the pan. If you roast 2 cups at a time use a large baking pan so there's room enough for the peanuts to be in a single layer.

Place in a 300-degree oven for 15 to 20 minutes. The nuts need to be stirred every 5-minutes so they do not burn. I usually just shake the pan.

Bake until the peanuts are brown. Be sure to watch closely because the peanuts can and will burn very quickly.

The smell of roasted peanuts is wonderful. We like them plain but if you like salted peanuts simply place a small amount of oil, perhaps a tablespoon, in your pan; stir until all the nuts touch the oil; sprinkle with salt and roast.

Thursday, March 8, 2012

Caramel Corn with Peanuts

Pat is always asking me to add peanuts to the caramel corn when I make it. But, I don't like peanuts in my caramel corn; well, until now I didn't.
You see, I have been roasting my own peanuts lately and used some of these in a recent batch of caramel corn.

Oh my, the home roasted peanuts added a wonderful flavor to my already wonderful tasting caramel corn.

I'm sold, from now on home roasted peanuts will be added to our caramel corn. The recipe can be found here; I added about 2 cups peanuts to the recipe.

Tuesday, March 6, 2012

The Baby Chicks

Our 4 baby chicks are doing very well; even the little one that almost died.
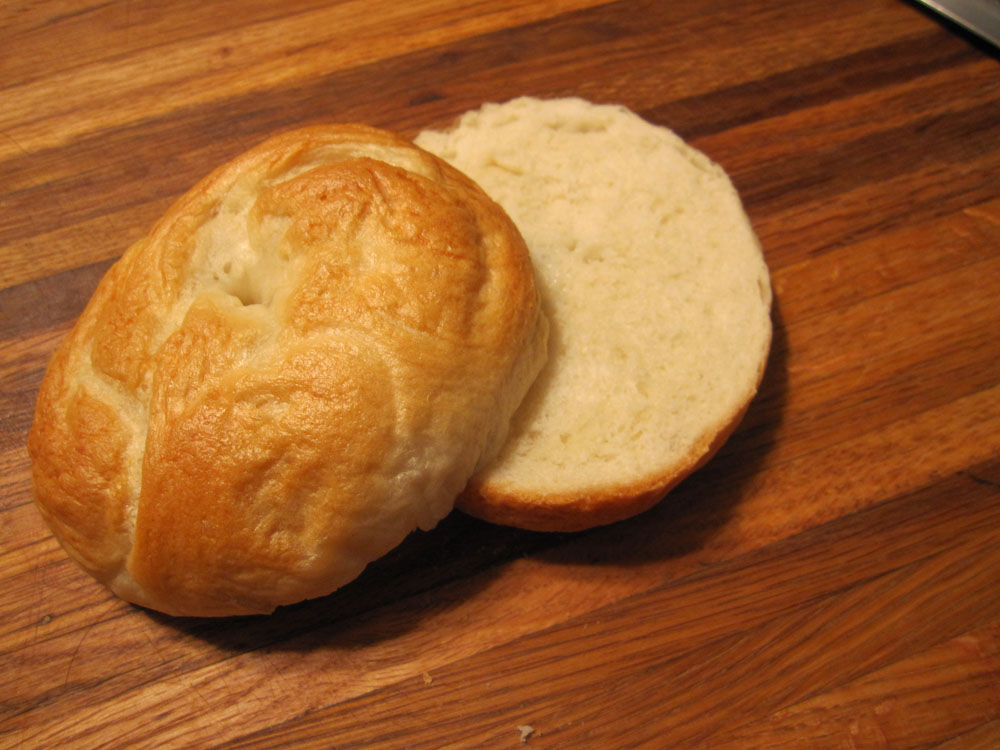
I've been putting them outdoors so they can enjoy the sunshine and warm temperatures; our box trap works well for keeping the chicks safe.

We have more eggs in the incubator; hopefully we will get a bigger hatching this time.

Friday, March 2, 2012

Cheese Crackers

After the success of the homemade wheat thins I decided to try a recipe for homemade cheese crackers. I was a bit concerned about how well the cheese would blend into the dough but it mixed up just fine. The original recipe called for a sharp cheddar but I only had mild in the fridge; it worked very well.

This recipe made about the same size dough ball as the whole wheat cracker.

Because it wasn't necessary to roll out the cheese crackers as thin as the wheat crackers I decided to work with larger pieces of dough.

Rolling out was very easy. I took time to cut away the rugged edges before cutting the dough into squares but this turned out to be unnecessary because these crackers cook at a lower temperature and the edges do not over cook.

The original recipe suggest poking holes in the center; I used a chop stick for this;

However, when the crackers baked the holes disappeared. Next time I'll not bother poking any holes.

I was very surprised how nice the crackers puffed up since the recipe does not call for any baking soda or baking powder.

They tasted very much like a Cheeze-it but the texture was nothing like it. We will be making these again.

The original recipe came from 365 Days of Baking. I only used 1/2 teaspoon of Lawry's Season Salt instead of 1 teaspoon and omitted the 1/4 teaspoon of regular salt.

Thursday, March 1, 2012

Drawstring Bags

I love keeping busy when I'm on the go by reading or doing handwork such as crochet.
I recently made myself a "fancy" drawstring bag to carry just one or two skeins of yarn.

It's the perfect size for a small project when I'm on the go.

I liked the bag so much I made a second one for a friend. Oh, and I forgot to mention...both bags were made from scraps!

msn live statistics
Hewlett Packard Laptop